Where to find your Stripe API credentials?
Help topics
You need API credentials to connect a new Stripe account to CashNotify. This article shows you where to find these codes on stripe.com.
1. Log into your Stripe account
Go to your Stripe API Keys dashboard:
https://dashboard.stripe.com/account/apikeys.
2. Get you Stripe API key
Recommended: Create a Restricted key in 2 clicks
Click here to read
CashNotify supports Stripe’s restricted API keys! This is a great improvement security-wise, as you can now use read-only Stripe keys with CashNotify.
➡️ Click here to generate a restricted key with the minimum required rights.
You can then Create the key at the bottom of the page.
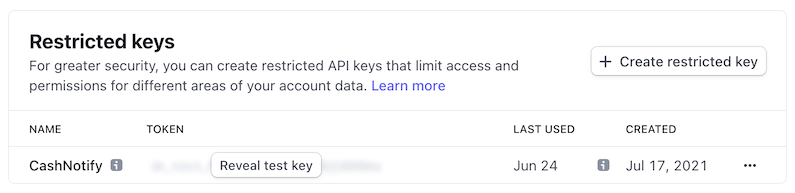
Once back to the API keys dashboard, in the Restricted keys section, click Reveal live/test key and copy the key to CashNotify.
Alternative: Create a Restricted key manually
Click here to read
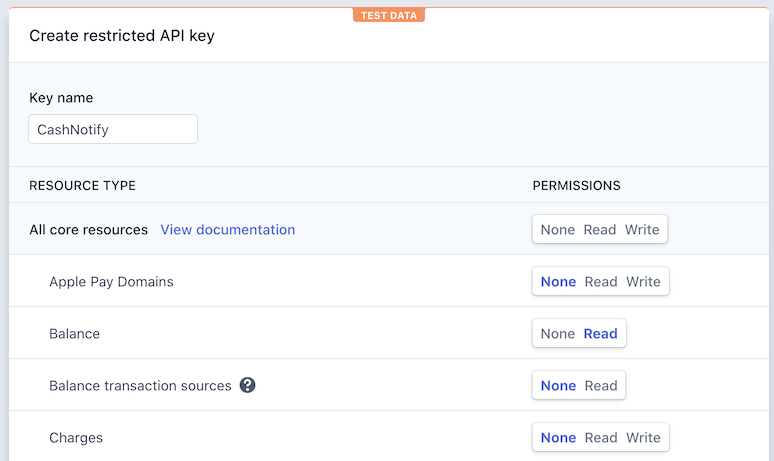
If you want to manually create a restricted key, these are the minimum required permissions CashNotify needs at the moment:
rak_balance_read: to show details for charges (e.g. fees)rak_event_read: to fetch for new eventsrak_invoice_read: to make a connection between charges and associated productsrak_payout_read: to show payout details (e.g. date)rak_subscription_read: to show subscription events (e.g. subscribed, canceled)rak_customer_read: to show details about the customer (e.g. email and country)rak_product_read(added in 2022-06): to get details about products associated to a charge or subscription
The following permissions are optional, and will let CashNotify automatically get your Stripe’s account name and icon:
rak_connected_account_read(added in 2022-06): CashNotify can automatically get your account name from Stripe. Note that this permission is not available from Stripe’s dashboard. It’s automatically set when you create an API key via the link above.rak_file_write(added in 2022-06): CashNotify can automatically get your account logo from Stripe. To do this, it needs to create a public link to the logo file hosted on Stripe, hence thewritepermission.
If you don’t allow for these optional permissions, you’ll notice that the account displayed in CashNotify will use a generic name and logo. You can still set a custom name and logo after adding the account to CashNotify, by clicking on the name and logo to choose another file (png/jpg/gif/ico):
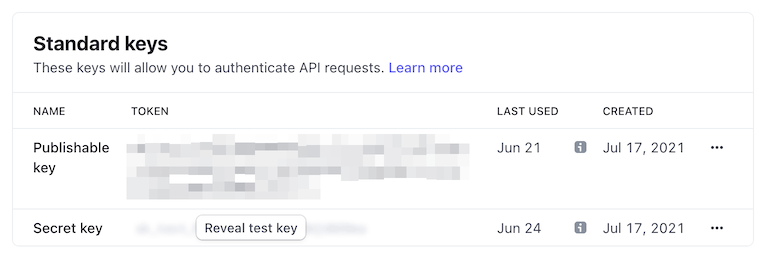
Alternative: Use a Standard Secret key
Click here to read
In the Standard keys section, click Reveal live/test key and copy the key to CashNotify.
Note that you need to use the Secret key, not the Publishable key.
3. That’s it!
Once you paste the API key into CashNotify, it will start validating the key. If everything’s good, your account will be valid in CashNotify:
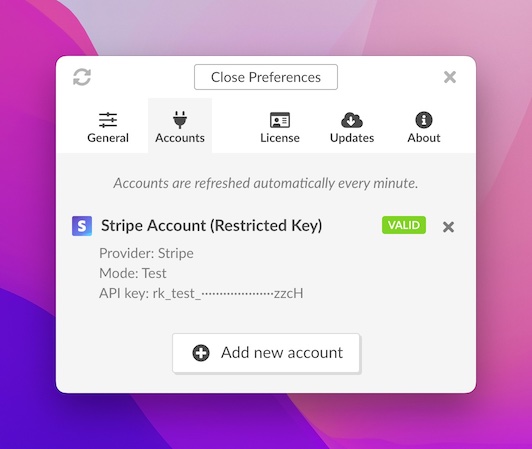
CashNotify will try to access your Stripe account, and get your last 50 events so you have some data to look at.
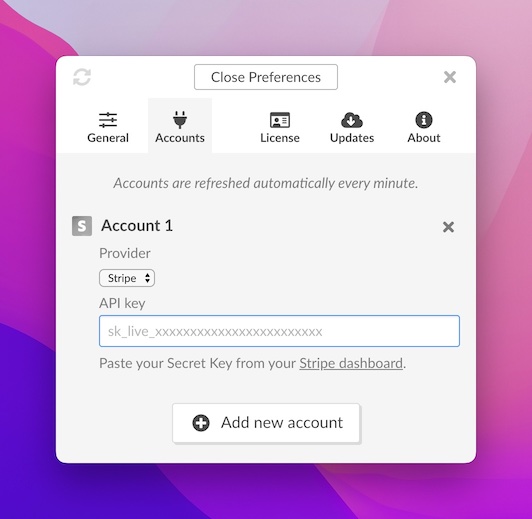
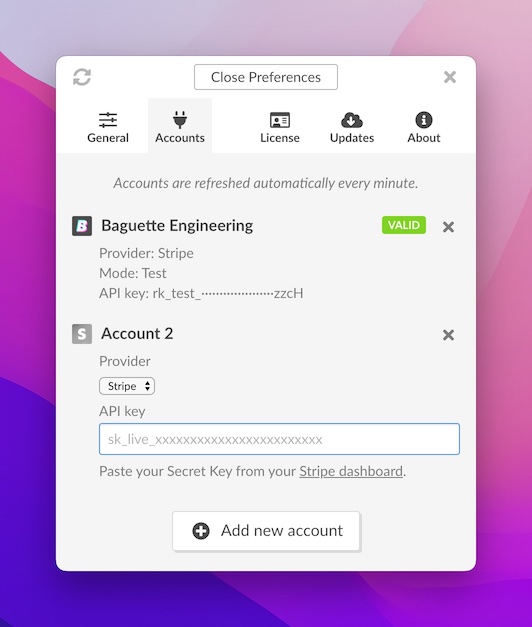
To monitor multiple Stripe accounts, head over to Preferences > Accounts, and click Add new account. Add as many live or test API keys as you need.
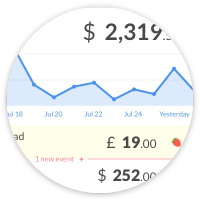
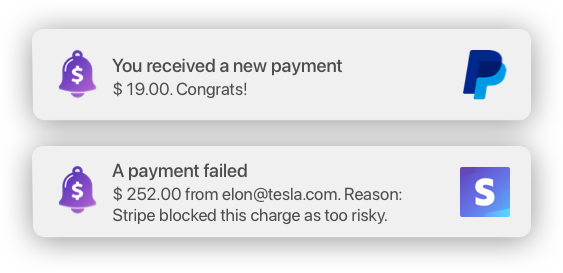
Now go sell some products and watch these notifications pop!
Got any questions? We’re just an email away! :)